Tutorials / Substance Designer
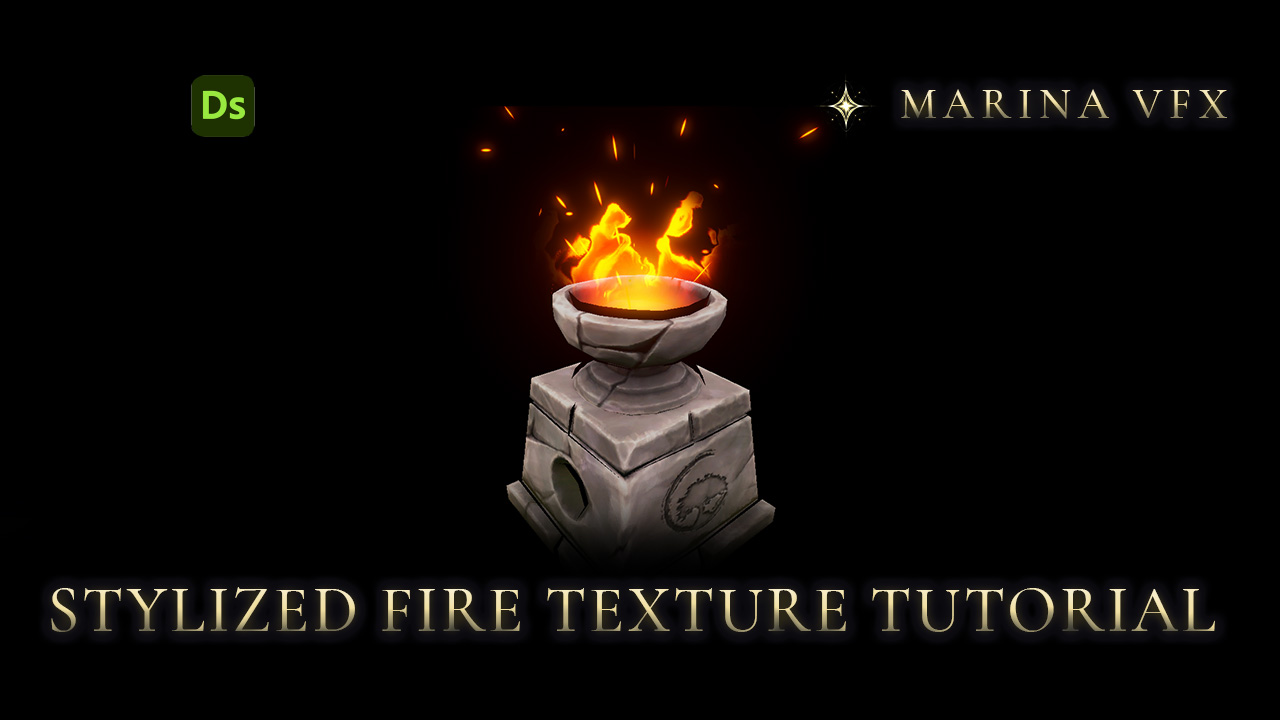
Learn how to create a stylized, procedural fire texture in Substance Designer. Build flowing flame shapes from noise, give them rhythm with a soft wave, and blend everything into a looping grayscale texture for real-time VFX.
Watch on YouTubeFrom noise to flame.


Project Files
Download the Substance Designer project and explore the complete node setup used to build the texture in this tutorial.
Written Guide
The texture is built from two main systems: a directional fire pattern and a softer wave shape. By combining them, we can create a flame texture that feels structured, flowing, and expressive while remaining fully procedural.
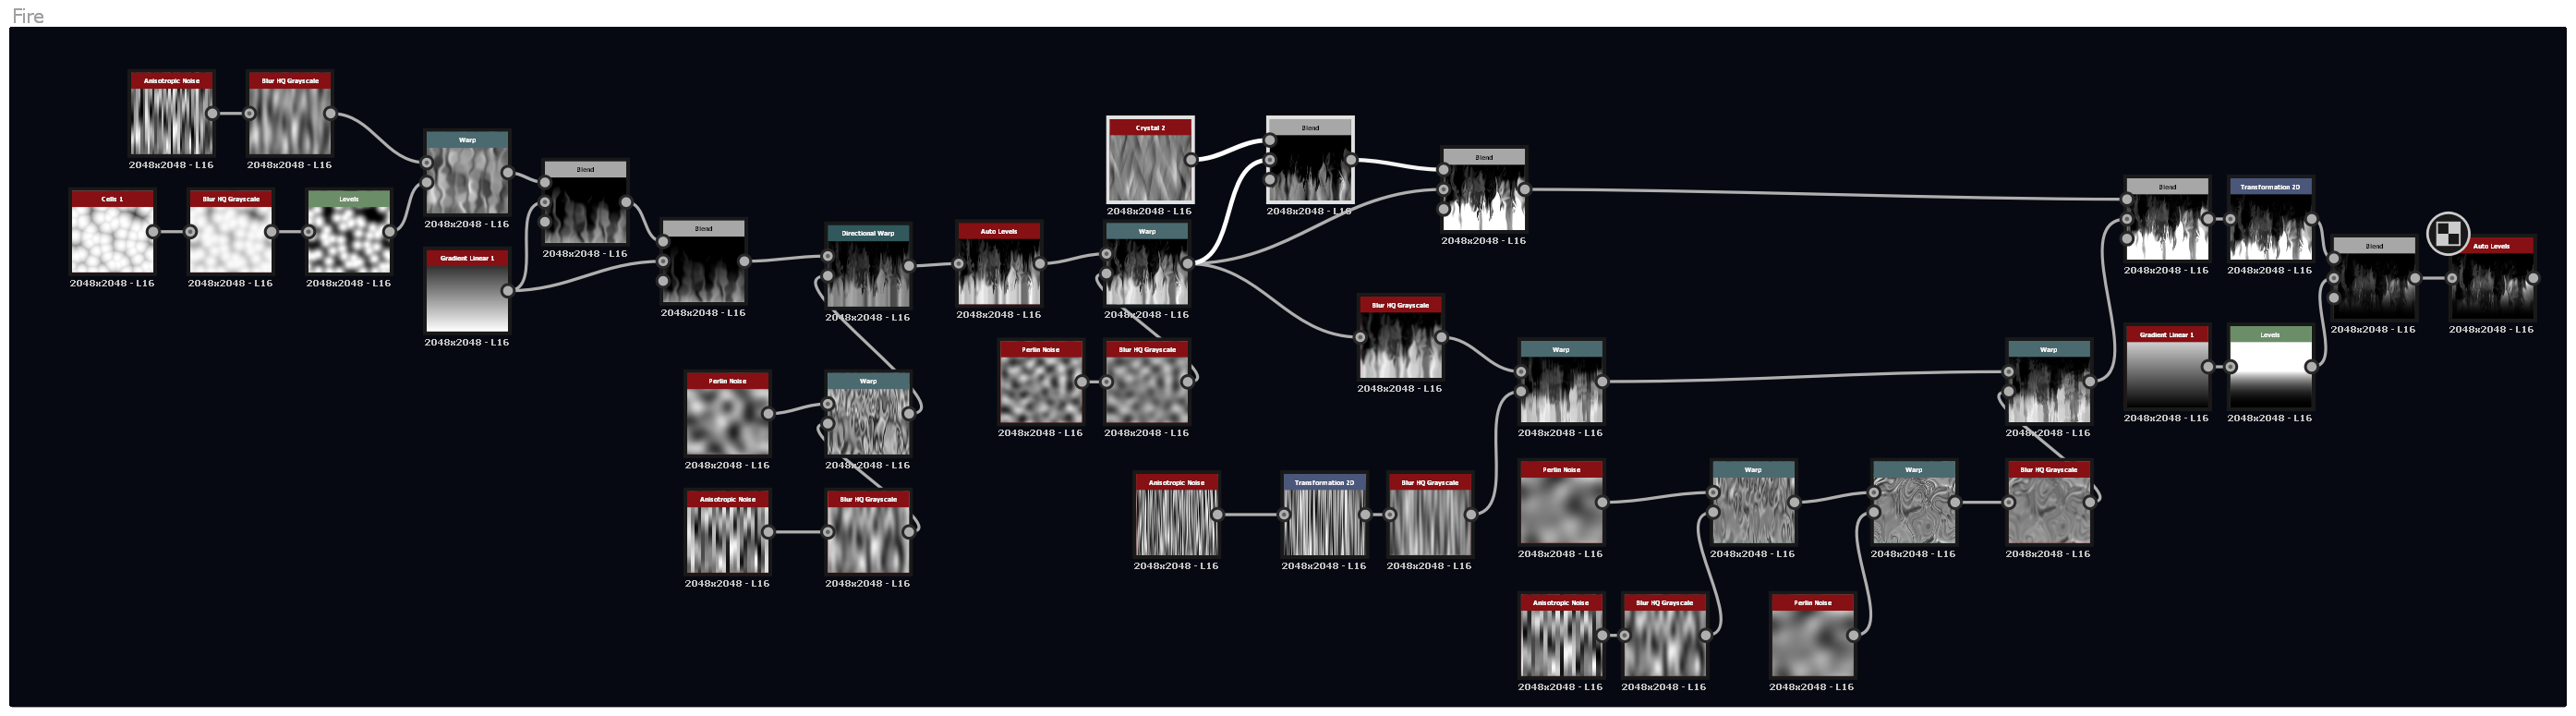
Start with Anisotropic Noise and warp it using Cells 1 to create long, vertical streaks that begin to resemble the structure of fire.
Use this combination to establish a strong upward flow and a clear sense of heat and movement, even though the texture itself is completely static.
Then refine the shapes with a few Blend and Levels adjustments. Keep the main structure readable, but introduce enough variation so the pattern feels organic rather than repetitive.
At this stage, aim for a pattern that feels both controlled and alive — a simple visual rhythm that can serve as the foundation for the final flame texture.
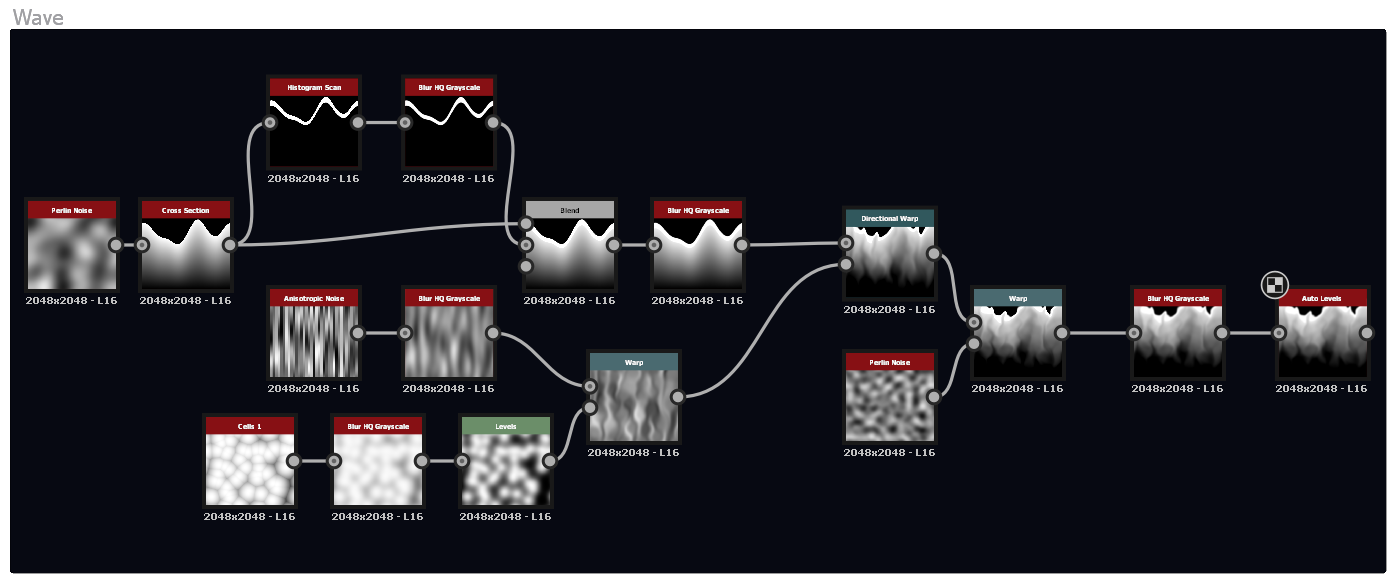
Start with Perlin Noise and shape it using Cross Section to define the main silhouette of the wave and create a smooth, curved form.
Then use several Warp and Blend adjustments to emphasize the edge and introduce more variation into the shape. The goal here is not to create actual motion, but to give the texture a stronger sense of flow and make the wave feel more natural and expressive.
Keep the overall structure simple and readable while preserving a clear rhythmic direction.
At this stage, aim for a calm, flowing pattern that can later be combined with the Fire Noise to add more movement and variation to the final texture.
Combine the Fire Noise and Wave Motion patterns to shape the final flame texture.
Use the wave to break up the vertical structure of the fire noise and introduce softer curves into the silhouette. The goal is to keep the strong upward direction of the flame while making the overall shape feel less rigid and more natural.
Refine the result with several Blend, Warp, and Levels adjustments. Use these nodes to control the silhouette, strengthen the brighter inner areas, and create a softer falloff toward the edges.
Keep the final texture in grayscale so it remains flexible for use later in the shader.
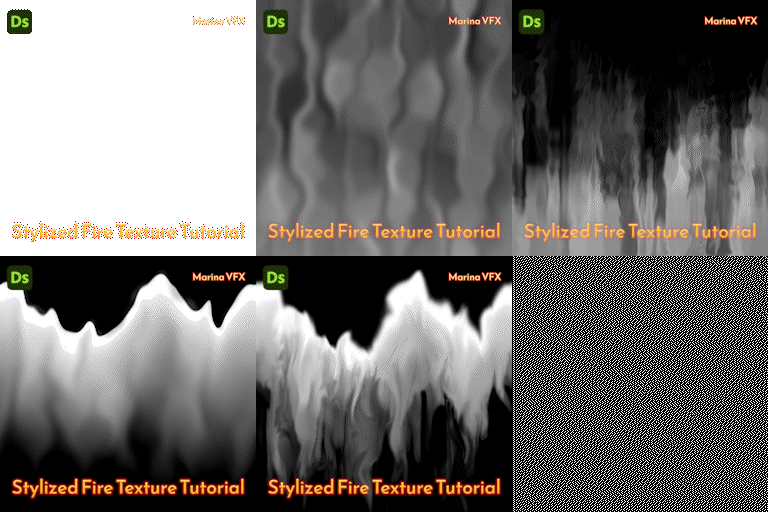
For visualization, apply a Gradient Map that transitions from white through yellow, orange, and red to black. This makes it easier to preview how brightness and temperature can be distributed across the flame without changing the underlying grayscale texture.
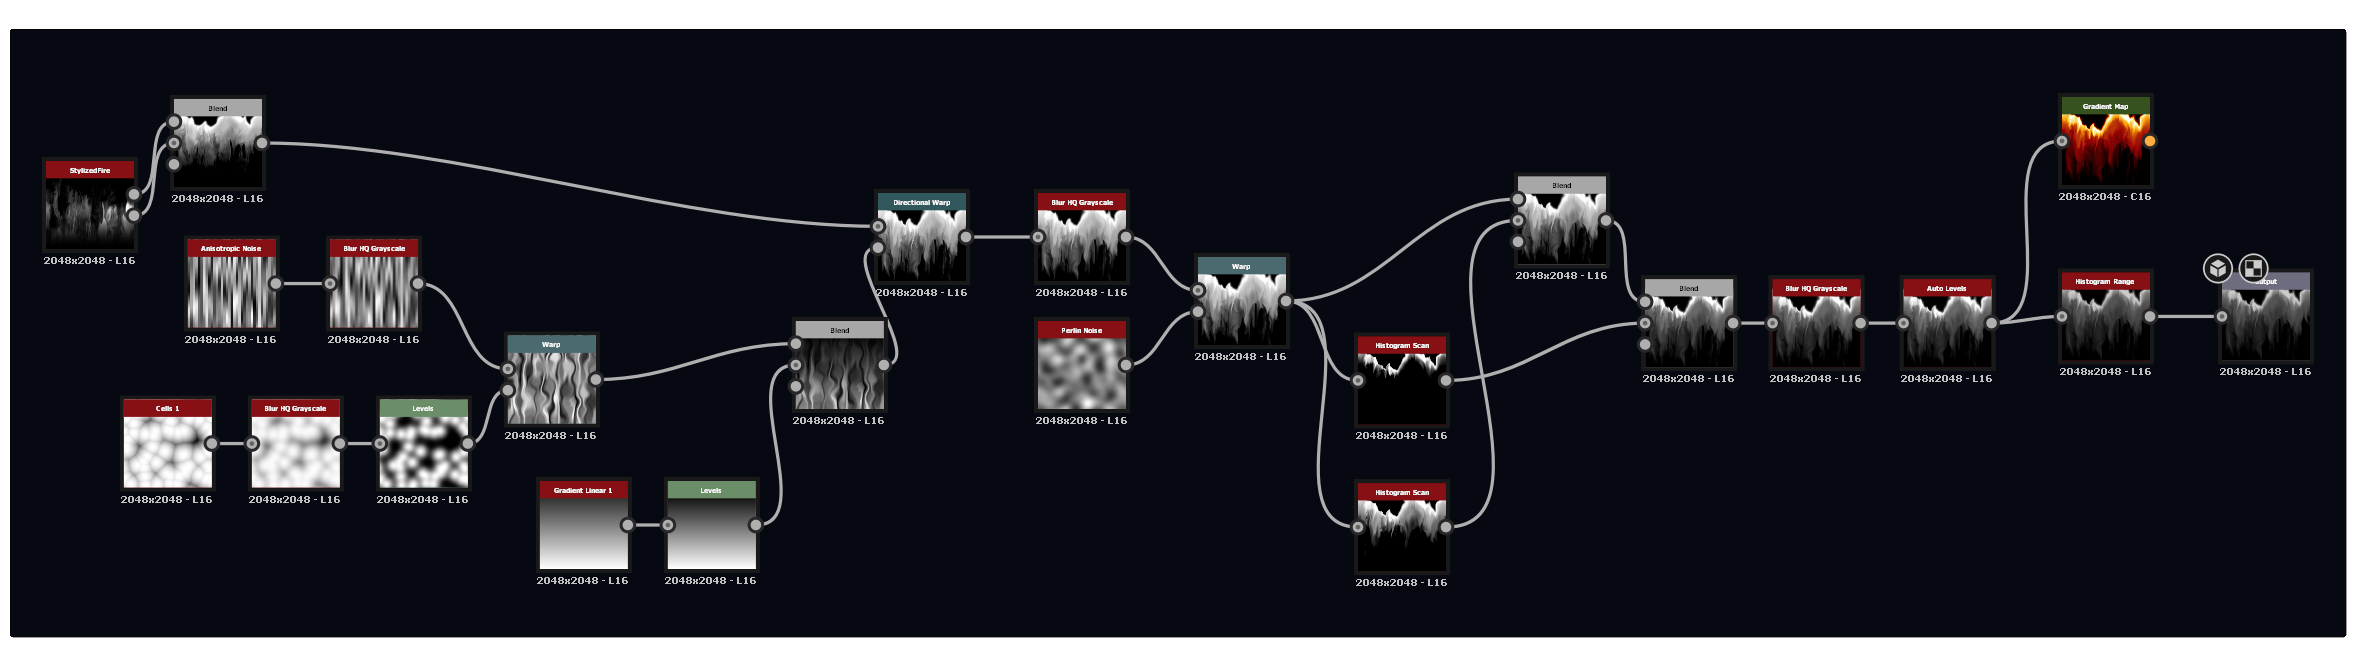
This texture is a good example of how simple procedural shapes can become expressive once they are combined with intention.
By separating the process into a few clear systems — directional fire noise, a softer wave pattern, and the final blending stage — it becomes much easier to control the result and understand why each part is there.
The final texture is still relatively simple, but that is also what makes it useful. A strong grayscale base can be reused, recolored, distorted, and animated later inside a shader without locking the effect into one specific look.
More than anything, the goal is to build a texture that feels structured but not rigid — something that keeps enough variation to stay alive while remaining easy to control in production.
Continue the Course
This texture is only the first step. Continue with the full fire setup to see how the texture is transformed into a complete real-time VFX effect.
Continue the Fire Course