Tutorials / Substance Designer
Learn how to create a set of stylized ember textures in Substance Designer using Tile Sampler, masks, warping and glow — ready to combine into a particle flipbook for real-time VFX.
Watch on YouTubeFrom fragments to glow.


Written Guide
Build four stylized ember texture variations in one Substance Designer graph using Tile Sampler, masks, warping and glow. The final textures are designed to work together as a flipbook for real-time particle effects.
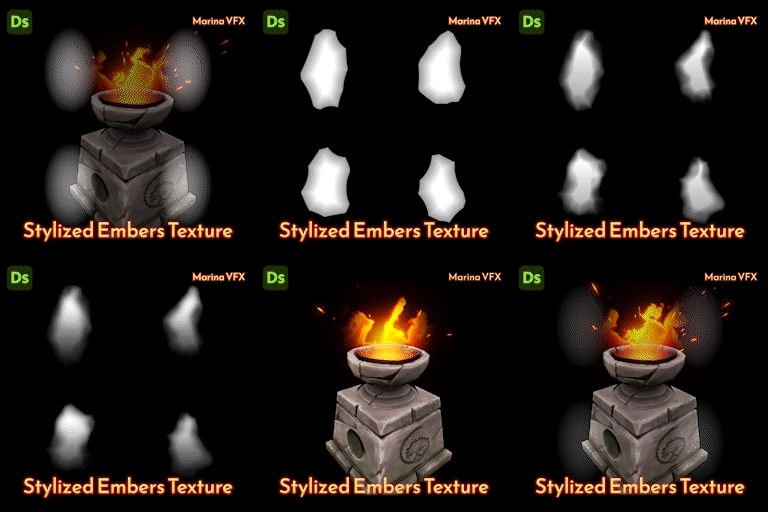
Instead of creating four separate textures and assembling them into a flipbook later, you can build all four textures at once. There are several ways to approach this — this is simply one possible setup.
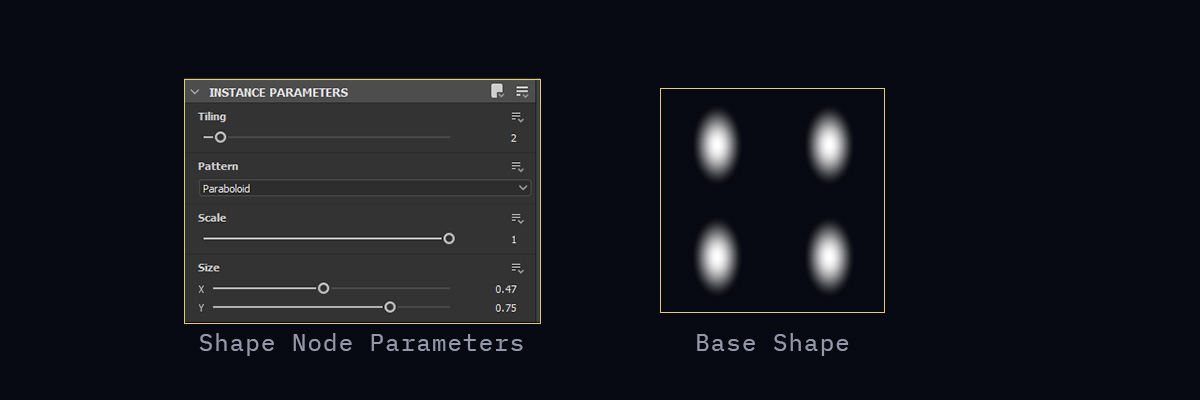
Start with a Shape node, set Tiling to 2, and choose Paraboloid as the shape. This immediately gives you the four base particles.
Then adjust the scale of the circles to stretch them into elongated ellipses. At this point, the basic spark shapes are ready.
With this setup, the particles all share the same base scale. If you want more variation, you can feed the shape into a Tile Sampler and introduce scale differences there.
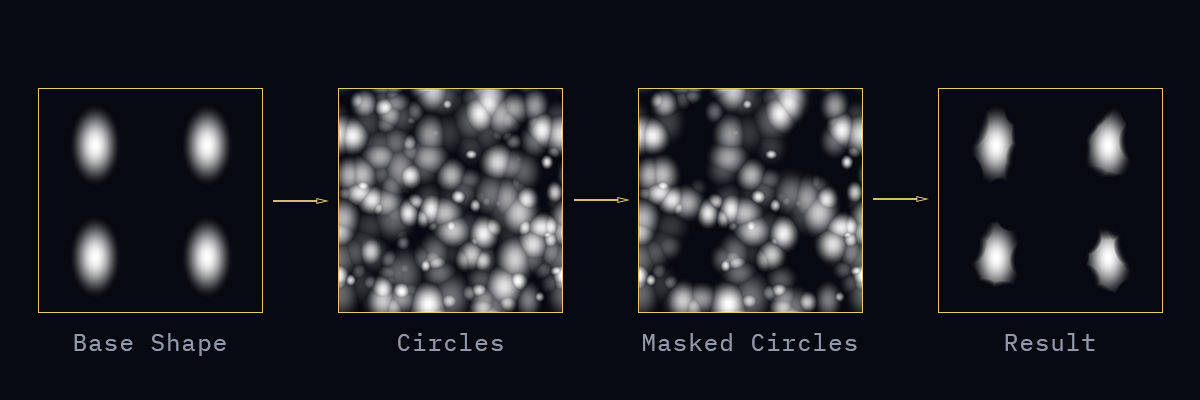
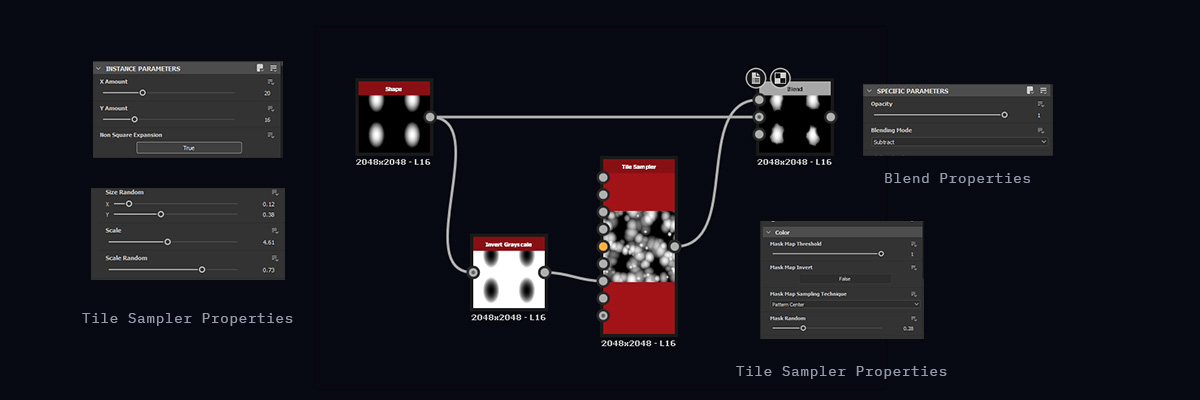
Next, subtract smaller circular shapes from the main particles to create the irregular silhouette of glowing fragments you can see in a real fire.
Use a Tile Sampler to scatter circles across the texture. Add variation to their scale, X and Y size, position, and brightness. You can also introduce some rotation variation to make the distribution feel less uniform.
Then take the mask created in the first step and invert it using an Invert Grayscale, so black becomes white and white becomes black. Connect it to the Mask Map Input of the Tile Sampler. In the Color tab, adjust Mask Map Threshold to control how strongly the mask limits where the circles can appear.
The circles will now appear only in the white areas of the mask. This keeps the center of each ember intact while allowing the scattered circles to cut into the outer edges, creating a more irregular, fire-like shape.
Finally, combine the two shapes with a Blend node set to Subtract. This will remove the circular forms from the base mask and give you the desired ember-like shape.
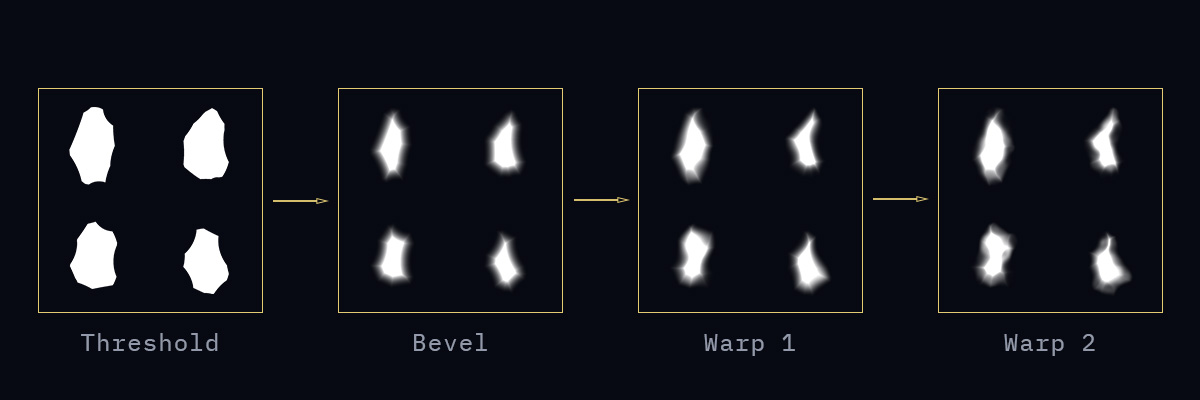
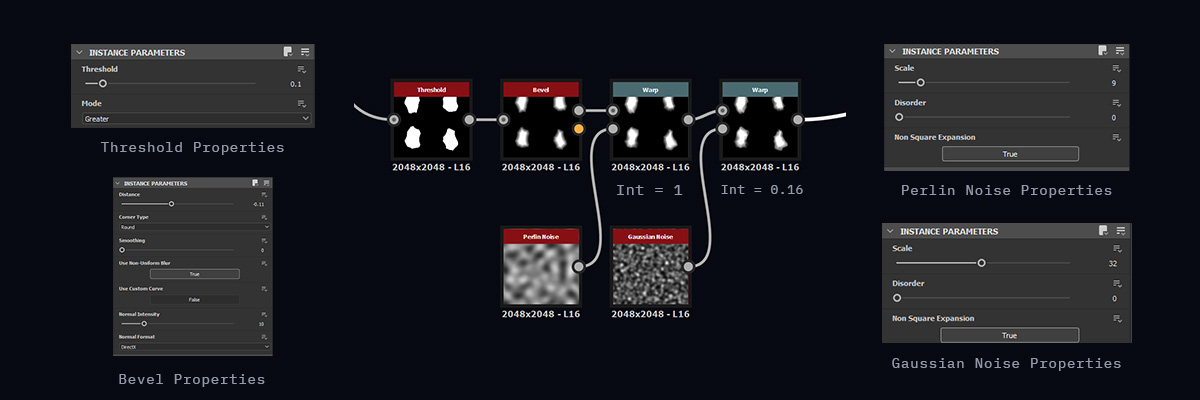
Next, use a Threshold node to define the hard shape of the particles and remove the remaining gradients, making the texture easier to work with.
Then add a Bevel node with a negative Distance value. This creates a brighter center with a softer falloff toward the edges.
Finally, pass the particles through several Warp nodes using different noises at different scales. This helps break up the straight edges, adds irregularity, and gives the textures a more organic, lively feel.
Once the main shape is ready, move on to controlling the brightness of the texture. Think of an ember particle in motion: the upper part often appears brighter because it burns and moves through the air. To reflect that in the texture, make the particle brighter at the top and darker at the bottom.
Start with a Gradient Linear node and set Tiling = 2. Then use a Transform node to shift the gradient so it begins from the top instead of the center. Pass it through Levels so you can control the brightness and contrast of the gradient more precisely.
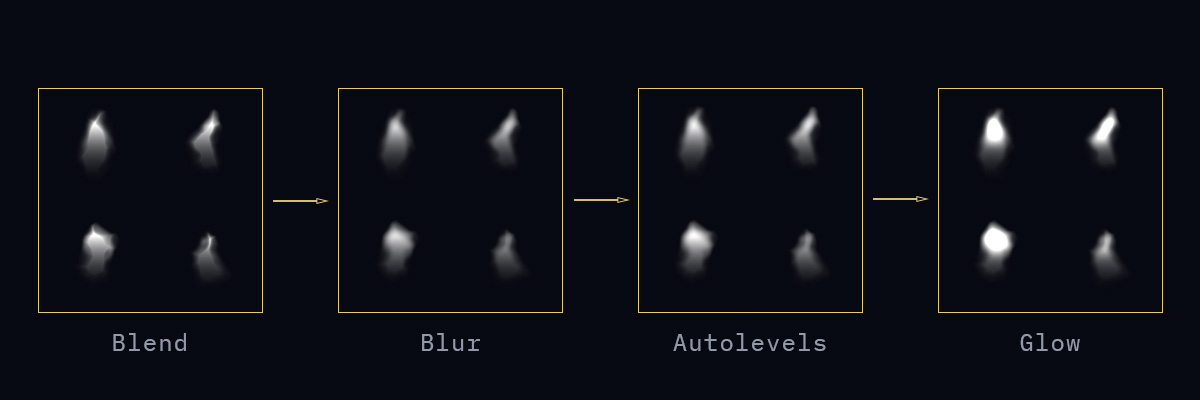
Next, combine this gradient with the ember texture using a Blend node set to Multiply. This will darken the lower part of the texture while keeping the upper part brighter.
At this stage, some hard edges may still remain after the bevel step. To soften them, use Non-Uniform Blur Grayscale. Plug the same texture into both inputs so the blur is driven by the texture itself. In this setup, the brighter areas will blur more strongly, which helps smooth the transitions.
To keep the overall brightness in a good range, run the result through Auto Levels. Finally, add a Glow Grayscale node to give the texture a subtle glowing effect.
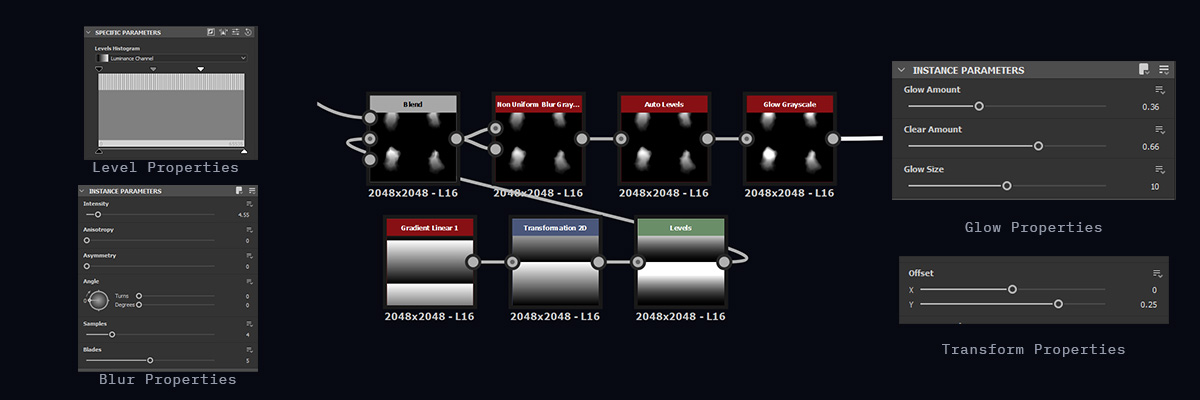
This setup is a simple example of how a few procedural tools can create a lot of variation from a very small base.
By building all four ember textures at once, it becomes much easier to keep them visually connected while still introducing differences in shape, distortion, brightness and glow. Small changes to the masks, warping or gradient can completely change the character of the particles.
The final textures can then be combined into a flipbook and used as a flexible base for stylized sparks, embers and other small fire particles in real-time VFX.
What I like about this setup is that the texture starts from very simple geometric shapes, but after a few layers of subtraction, distortion and light, they begin to feel much more organic — like small fragments that still carry the memory of the flame.
Continue the Course
This texture is one part of the full stylized fire setup. Continue with the course to see how it comes together into a complete real-time VFX effect.
Continue the Fire Course